Any floor, even the best, can be damaged. A dropped iron, a dent from a furniture leg moved without felt, a scratch from suitcase rollers, a local crack after an impact - these are situations that every floor user encounters sooner or later. The good news is that in the case of vinyl planks, replacing a single damaged element is possible and does not require dismantling the entire floor.
However, the replacement method depends on the installation method - click and glue are two completely different processes. In this article, we describe both, step by step, along with the most common difficulties and ways to get around them.
Before you start – a few things to check
Before replacing, make sure you have a spare panel from the same collection and production batch. This is a key detail - vinyl panels may differ in shade between production batches, and the difference visible when compared directly can be clear. Therefore, when purchasing a floor, it is always worth leaving a few panels as a spare.
If you are out of stock, please contact the seller and provide the collection number and batch number from the packaging. The older the purchase, the more difficult it is to achieve a perfect fit - but it's worth trying before deciding to replace the entire floor.
Also check the cause of the damage. If the panel has cracked or deformed due to a subfloor problem - unevenness, moisture or settling - simply replacing the panel will not solve the problem. The new panel will behave the same as the old one if the cause is not eliminated.
Panel replacement using the click system
The click system has one important advantage: the panels can be dismantled and reassembled without damaging the material. In theory, this means that replacing a damaged panel should be simple. In practice, it depends on where the damaged panel is located.
Panel against the wall or in the last row
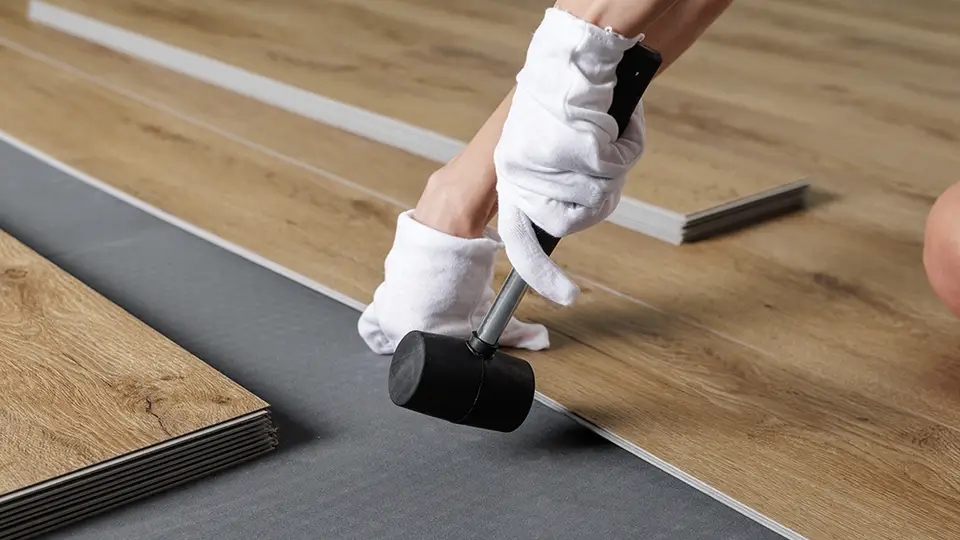
This is the simplest case. Remove the baseboard against the wall. Unlock and remove the panels in a row, starting with the last one against the wall, until you reach the damaged element. Insert the new panel, then install the remaining panels in the reverse order. Reinstall the strip.
The click VTL lock in the 5G system is unlocked by lifting the panel at an angle of approximately 30 degrees and pulling it up. The 2G system works similarly - the panel lifts at the long edge and slides out. Details about 2G, 5G and 5Gi lock systems can be found in a separate article on the VTL website.
Panel in the middle of the room
This is a more difficult case, because to reach the middle panel, you have to dismantle all the rows from the wall up to the damaged area. In large rooms, this may be time-consuming, but it is doable - click panels do not lose their properties when dismantled properly and can be re-arranged.
Start with the wall closest to the damaged panel. Remove the molding, then remove the panels row by row, putting them aside in order. When you reach a damaged panel, replace it with a new one and put it back together in the reverse order.
If the damaged panel is located exactly in the middle of the room and dismantling half of the floor is unprofitable, you can use an alternative method - cutting out the damaged panel and pasting a new one. We describe it below in the section about glued panels, because the technique is similar.
Replacing a glued panel
Vinyl panels are permanently bonded to the substrate, so their disassembly without damaging the adjacent panels requires more precision. However, the procedure is well known to renovation teams and, with a bit of patience, can be done on your own.
Tools needed to replace a glued panel
You'll need a sharp wallpaper or tile knife, a drill with a wood bit, a jigsaw or an oscillating multi-tool, a chisel, a glue remover or solvent compatible with the substrate, and a vinyl plank adhesive to reattach the new panel.
Step by step – cutting and replacing
The first step is to drill holes in the corners of the damaged panel. Use a drill with a diameter of 8-10 mm - the holes will be the starting point for the jigsaw or knife. Drill a few millimeters from the edge of the panel so as not to damage adjacent elements.
Using a wallpaper knife, cut the panel along the edge, keeping the blade right next to the border with the adjacent panel. The cutting depth should correspond to the thickness of the panel - cut only the panel, not the substrate. If you have an oscillating multi-tool, it will make cutting around edges much quicker and easier.
Once all four edges are cut, divide the panel into smaller pieces - cut several internal cuts perpendicular and parallel. Small pieces are easier to tear off from the adhesive without damaging the substrate.
Gradually loosen the panel pieces from the substrate with a chisel or spatula. Work slowly, keeping the tool parallel to the floor surface. If the glue holds tightly, you can heat the surface with a construction hair dryer - the heat softens the glue and makes it easier to loosen.
After removing all the pieces, clean the surface of the old glue - use a scraper or grinder. Adhesive residues prevent the new panel from properly adhering and may create unevenness visible on the surface. Finally, check whether the cleaned surface is even and dry.
Installing a new panel
The new panel must be cut to the appropriate size. Measure the opening and cut the panel with a margin of 0.5 mm smaller on each side - so that it will fit without forcing. Glued vinyl panels are installed without expansion gaps between the elements, so the opening should be precisely matched.
Apply the adhesive to the substrate in accordance with the manufacturer's recommendations - spread it evenly with a notched trowel with the appropriate tooth spacing. After the adhesive opening time indicated by the manufacturer - usually a few to several minutes - press the new panel, pressing it from the center to the edges to prevent air bubbles from forming. Use a roller or a hard object covered with a cloth to press down evenly on the surface.
The hardening time of the glue is usually 24 hours - during this time, do not load the replaced panel and do not wash it with water. After this time, the floor is ready for use.
When replacing a single panel is not enough
There are situations where replacing one or several panels is only a temporary solution, and the real problem lies elsewhere. If the panels crack, deform or detach in many places, the cause may be uneven surface movement, high floor humidity or incorrect installation.
If you suspect a systemic problem, it is worth assessing the condition of the entire floor before spending money on subsequent replacements. Proper preparation of the substrate before installation is the key to the durability of the panels - if this stage was omitted or performed imprecisely, problems will recur regardless of the number of panels replaced.
Summary
Replacing a damaged vinyl panel is possible in both the click and glue systems. In the case of click - the closer the panel is to the wall, the easier it is. In the glued case - cutting precision and patience when removing the glue determine the quality of the final result. In both cases, it is crucial to have spare panels from the same production batch and to properly diagnose the cause of damage before replacing them.
Looking for the perfect floor?
Discover our full range of vinyl flooring and find the ideal solution for your interior.
Want to see our articles more often in Google?
Add VinylTechLab as a preferred source in Google Search so our guides and inspiration appear more often for you.
Add in Google