Installing vinyl panels in the click system is one of those renovation tasks that you can do yourself without any experience in construction work. It does not require specialized tools, does not stain like screed or smell like glue - and the effect, with proper preparation, is indistinguishable from the work of a professional team. More and more people decide to install it themselves because click panels have been designed with ease of installation in mind.
The key to success is the sequence of activities and careful preparation of the substrate. In this article, we guide you through the entire process - from assessing the substrate, through acclimatizing the panels, to installing the last row and finishing with strips. If you follow these steps, your floor will last for many years without creaking, cracking or bulging.
Before you start – tools and materials
To install click vinyl panels yourself, you need a few basic tools. Most of them can be found in every home or bought for a few zlotys.
Necessary tools include: a ruler and a pencil for measuring and marking, a tile cutter or a special knife for vinyl panels for cutting straight sections, a jigsaw or hacksaw for curved cuts at door frames, a rubber hammer or assembly block for tapping the panels, a level or a 2-meter patch to check the evenness of the subfloor, and a spacer wedge to maintain the expansion joint at the wall.
When it comes to materials, in addition to the panels themselves, you need an underlay - if the panel you choose does not have an integrated underlay - and skirting boards and thresholds to finish the transitions between rooms.
Step 1 – assessment and preparation of the substrate
The substrate is the foundation of the entire work. Vinyl panels, especially the thinner ones, faithfully reproduce every unevenness of the floor - every recess and bulge will be visible and palpable after installation.
Place a 2-meter patch on the floor in several directions and check that the gap between the patch and the ground does not exceed 2 mm. This is the tolerance required by vinyl plank manufacturers - with deviations above this value, the floor will work, creak or deform in uneven places.
Irregularities up to 5 mm can be leveled with putty or self-leveling compound. Larger defects require a self-leveling screed, which after drying gives a perfectly smooth and hard surface. The drying time of a standard self-leveling compound is 2-4 hours, screeds - usually 24 hours. Don't rush this stage - an imprecise subfloor is the most common cause of problems with the installed floor.
The substrate must also be dry. If you are laying the panels on concrete or screed, measure the humidity with an electric meter. If you suspect increased humidity, use a more precise measurement using the carbide method. Detailed guidelines for preparing the substrate can be found in a separate article on the VTL website.
Old floors – tiles, parquet, laminate – can remain in place if they are stable, even and adhere well to the subfloor. Loose tiles, loose parquet or swollen laminate must be removed before installation.
Step 2 – acclimatization of the panels
Vinyl panels require acclimatization before installation. Left in the packaging in the intended room for 24-48 hours, they get used to the ambient temperature and humidity, which minimizes the risk of expansion or contraction after installation.
The room temperature during acclimatization and installation should be between 15 and 30 degrees Celsius, and the relative air humidity should be between 30 and 70%. Installation should not be performed in rooms that have just been plastered or have been freshly screeded, where the humidity is still high.
Step 3 – layout planning and material calculation
Before you start laying, plan the layout of the panels on paper. Measure the width of the room and calculate how many panels will fit in one row and what width will be left at the opposite wall. If the last row would be narrower than 5 cm, move the starting point - start with a narrower first row so that the last one does not look like a thin leaf glued to the wall.
With a simple arrangement of boards, start from the wall with a window and arrange them towards the door - then the eyes fall parallel to the panels and the joints are less visible. In narrow rooms, arrange the panels along the longer axis - they will visually extend the space.
To calculate the amount of material, measure the area of the room and add 10% for waste. In very irregular rooms, with many recesses and doors, add 12-15%.
Step 4 – base and first panels
If your selected panels do not have an integrated backing, spread the backing over the entire surface before installation. Seal the joints of the subfloor with tape so that it does not move while laying. Do not fold the underlay overlapping - the combined layers create an unevenness that will be felt under the panels.
Start the first row from the left corner of the starting wall. Leave an expansion gap of 8-10 mm near the wall - use spacer wedges that will maintain this distance during installation. The gap is necessary - vinyl panels, although more dimensionally stable than laminate, expand slightly with temperature changes. They can be attached to the wall without a gap.
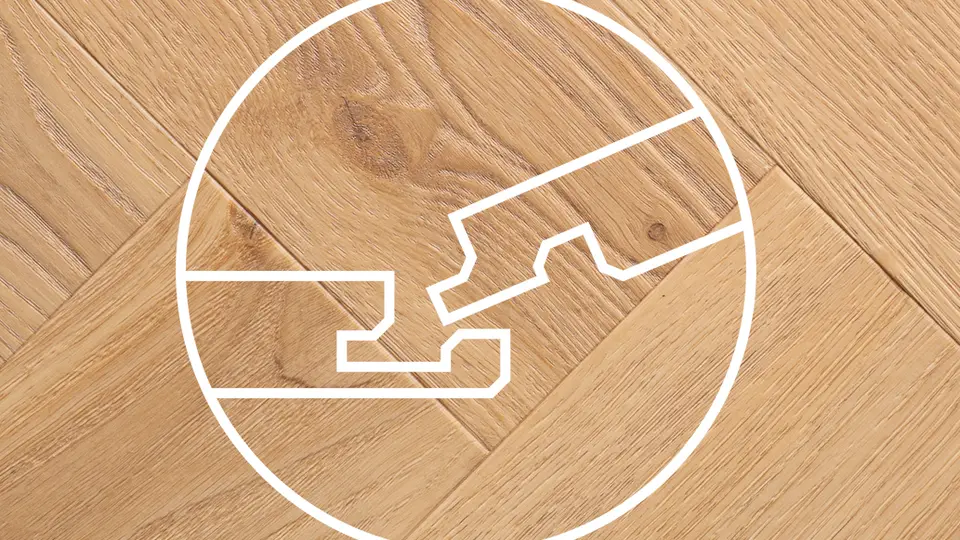
The click panels in the 5G system snap into place automatically on the short side - just slide the panel in at an angle to the previous one, lower it and feel the click. The 2G system requires the panel to be raised at an angle and then lowered to tighten the lock. Always check whether the joint is tight and even - a visible gap at the connection is a sign that the panel is not fully fastened.
Step 5 – next rows and tapping
For each subsequent row, start with a leftover panel from the previous row - if it is at least 30 cm long, you can use it as the first piece in the new row. This minimizes waste and at the same time ensures random placement of cross-joints, which should not form regular patterns or end up in one place.
The cross joints between the rows should be offset by at least 30 cm from each other. A pattern resembling a regular grid looks unprofessional and indicates an error in planning the layout.
When tapping the panels together, use a rubber hammer or a hammer with a block - never hit the edge of the panel directly, as this will damage the lock. At the wall, where there is no room to move your hand, use an assembly spatula - use it to pry the panel from the wall side and press it to the previous row.
Step 6 – cuts at door frames and thresholds
The door frame is one of the most difficult parts of installation. Instead of cutting out a complex shape around the door frame, a much simpler solution is to cut the door frame itself - using a hand saw with the panel as a guide. The panel inserted under the door frame looks professional and does not require additional finishing.
When cutting panels against the wall, mark the cutting line with a pencil, place a ruler and cut with a tile knife - usually two or three strong strokes are enough for the panel to crack along the line. Use a jigsaw for curved cuts.
Step 7 – last row and finishing
The last row often requires cutting across the width. Subtract the thickness of the expansion joint from the width of the room and measure how much is left - this is how wide the last row must be. Remember that the room may not be perfectly rectangular - measure the width at several points and cut each panel separately.
After laying the last panel, remove the spacer wedges and install the skirting boards. The strip should cover the expansion joint, but cannot be screwed to the panels - only to the wall or ground. The panels must work freely under the strip. At transitions between rooms, use an expansion threshold that masks the gap and at the same time allows the panels to move.
The most common mistakes during self-assembly
The first mistake is to omit the assessment of the subfloor - an uneven floor will always take its toll after installation. The second is the lack of an expansion joint or too small a gap near the wall. Third - laying the panels without acclimatization, which leads to bulging during temperature changes. Fourth - cross joints in one line, which look unprofessional. Fifth - using steam mops after installation, which destroys the UV layer of the panels.
VTL click vinyl panels are equipped with 5G and 5Gi lock systems that lock automatically and make installation much easier - especially when installing on your own without an assistant.
Summary
Self-installation of click vinyl panels is a viable option for anyone who can measure, mark and cut. The key is proper preparation of the substrate, acclimatization of the panels, expansion gaps and regularity in laying subsequent rows. If these rules are followed, the effect is durable, aesthetic and indistinguishable from professional installation.
Looking for the perfect floor?
Discover our full range of vinyl flooring and find the ideal solution for your interior.
Want to see our articles more often in Google?
Add VinylTechLab as a preferred source in Google Search so our guides and inspiration appear more often for you.
Add in Google